Discord Server Manual Configurations
TIP
This section is also available in the app while setting up your service.
While setting up your service / business, you will need to configure your Discord server manually at some point. This is a limitation by Discord which prevents us from doing it automatically.
Please note that some of these steps are required in order to get the bot to work properly within your Discord server.
Roles
TIP
This section is required only if you have set up your service to assign a role to users when they are on-duty.
- On Discord, go to Server Settings > Roles.
- Ensure that the role of the Discord bot is higher than the role you want to assign to employees when they are on-duty.
Example:

Integrations
TIP
The following sections are optional, but recommended. It will allow you to restrict who and where employees can use the bot.
To start, you'll need to perform these steps to access the OnClock integration page of your Discord server.
- On Discord, go to Server Settings > Integrations
- Scroll to see OnClock
- Press the "Manage" button on the right.
Role Restrictions
We highly recommend that you restrict access to OnClock commands to only the employees of the service if you are on the same Discord server as the rest of your community.
- In the Roles and Members section, turn off the
@everyoneoption. - Add all the roles that match the roles of your employees in the service and toggle them on.
Example:

Text Channel Restrictions
Although you previously selected a text channel while setting up your service, Discord does not know that the commands are only expected to be executed in that channel. This setting will make sure that the commands aren't shown in other channels.
- In the Channels section, disable the "All Channels" option.
- Select the text channel you selected while setting up your service.
Example:

Command Restrictions
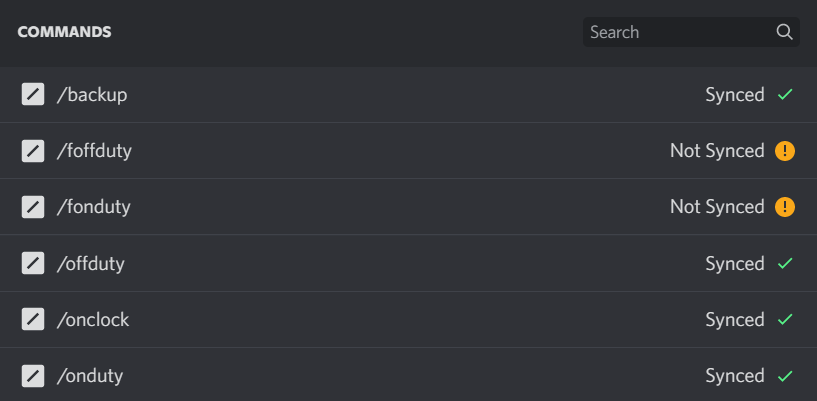
In the Commands section, you can disable any commands that you do not want to use. For example, if you don't want your employees to be able to request backup (mostly used by emergency services) you can disable the /backup command.
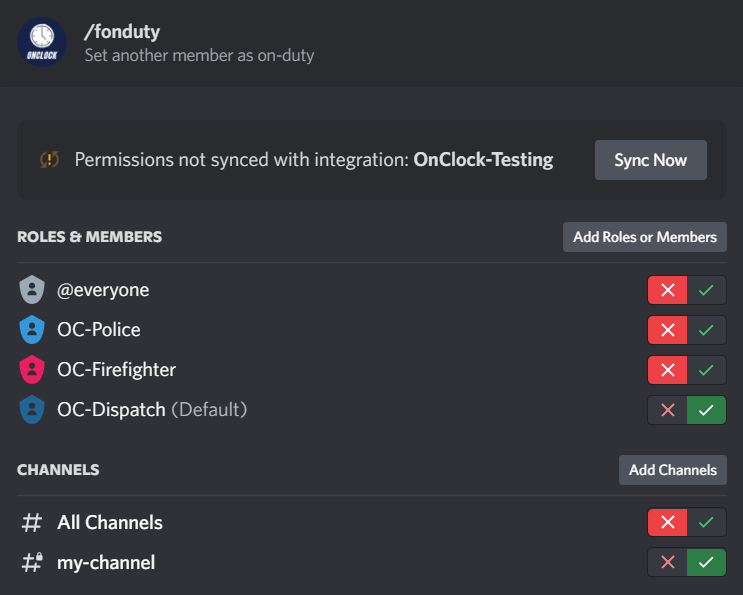
In addition, the /fonduty and /foffduty commands should only be used by your managers or superiors (e.g. a supervisor). We recommend that you configure them as private commands accessible to these roles only.
- In the Commands section, click on the command you want to configure.
- Disable and add the roles you want to restrict access to for that command.
- Disable and add the channels you want to restrict access to for that command.
Example:


/fonduty command is restricted to the "OC-Dispatch" role and will only be shown in the "my-channel" text channel