Enabling the Database Sync
The database sync feature allows you to view your civilian and vehicle data in real time inside the MDT. Once setup, this feature will be available for all services of your community.
As a community owner, you can enable the database sync feature by following these steps.
TIP
Please note that the MDT is a feature available on the OnClock Premium plan. You can set up the database sync feature for your community, but only premium services will have access to it through the MDT.
Officially Supported Frameworks
The database sync feature is compatible with any games or frameworks using a MySQL or MariaDB database.
We also provide built-in support for the following FiveM frameworks with customizable options:
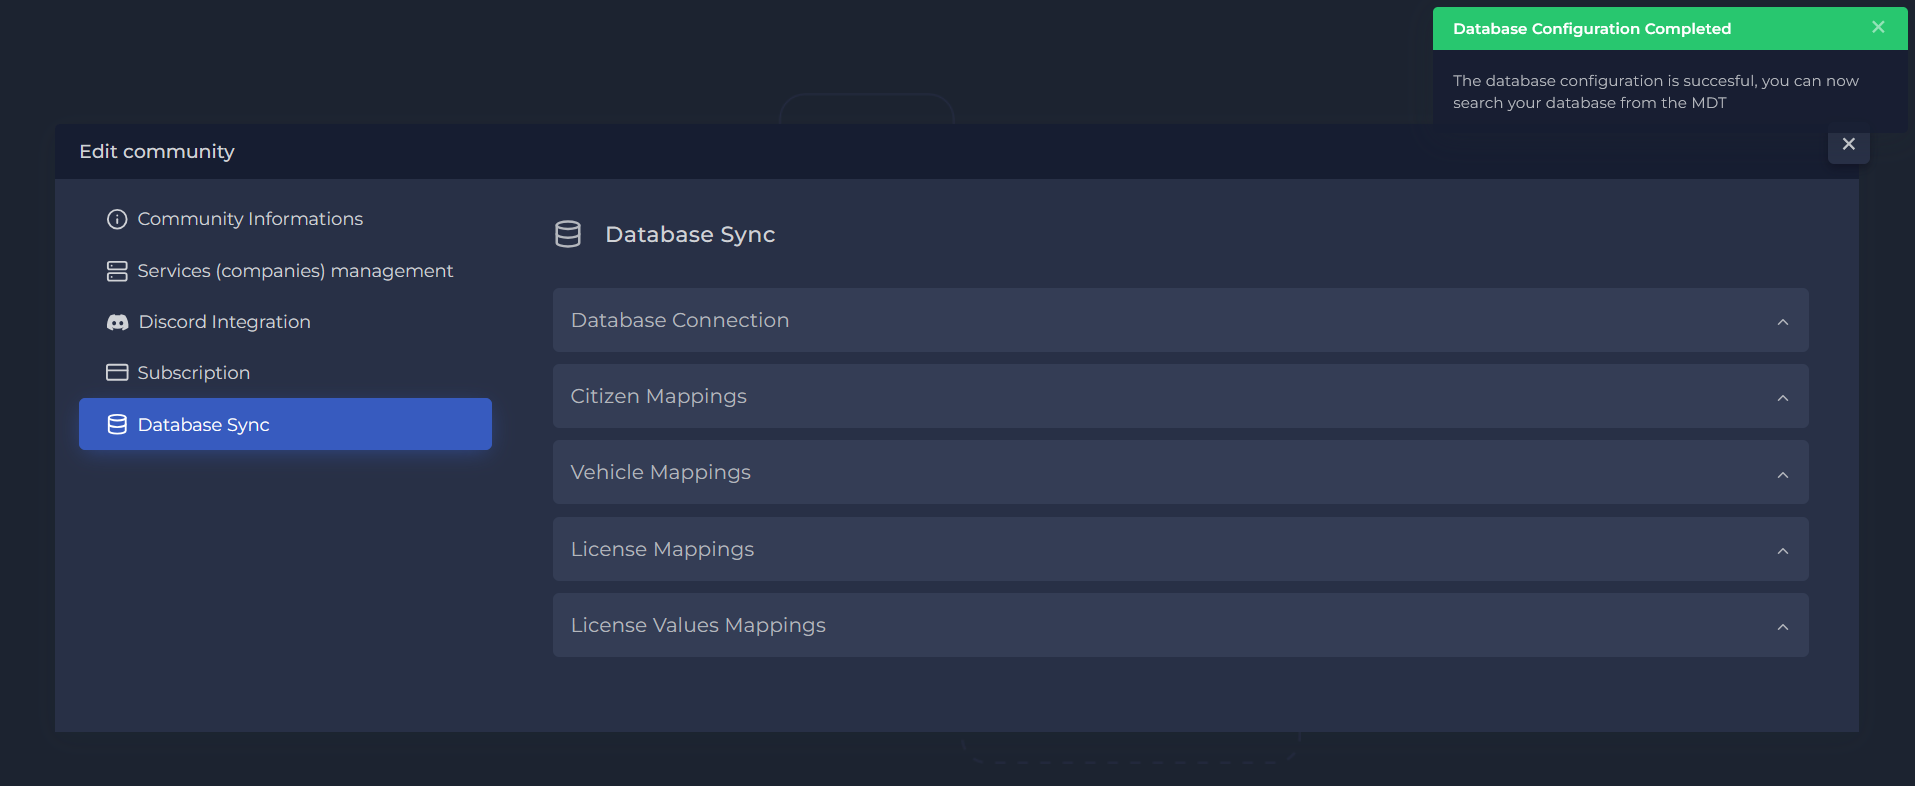
Open the Community Settings
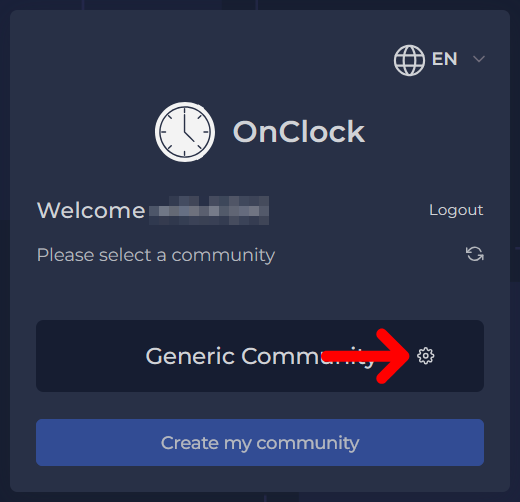
On the community selection page, click the gear icon next to your community name.
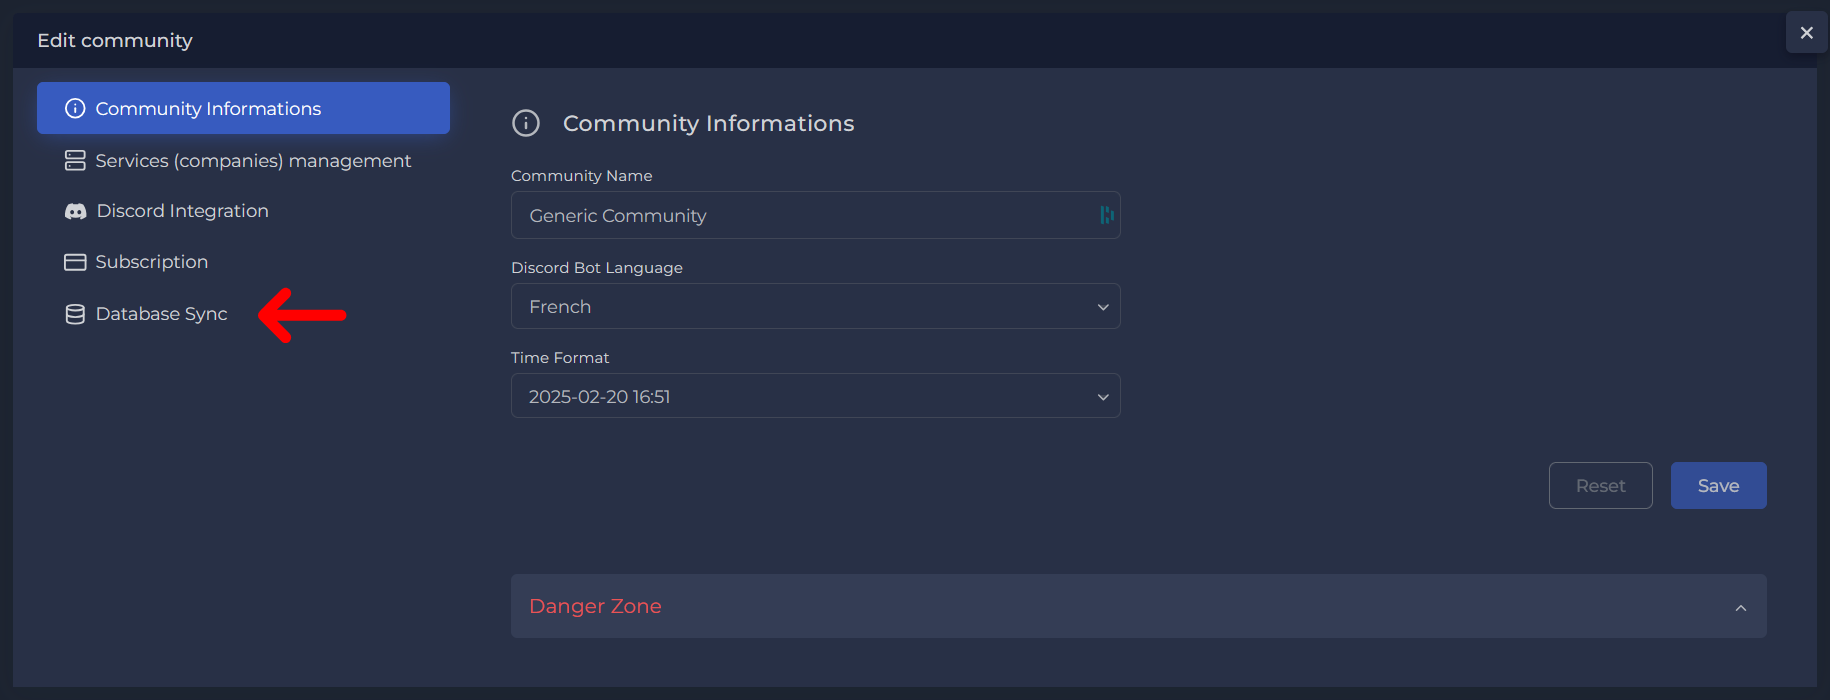
Click the "Database Sync" tab.
Set Up the Database Connection
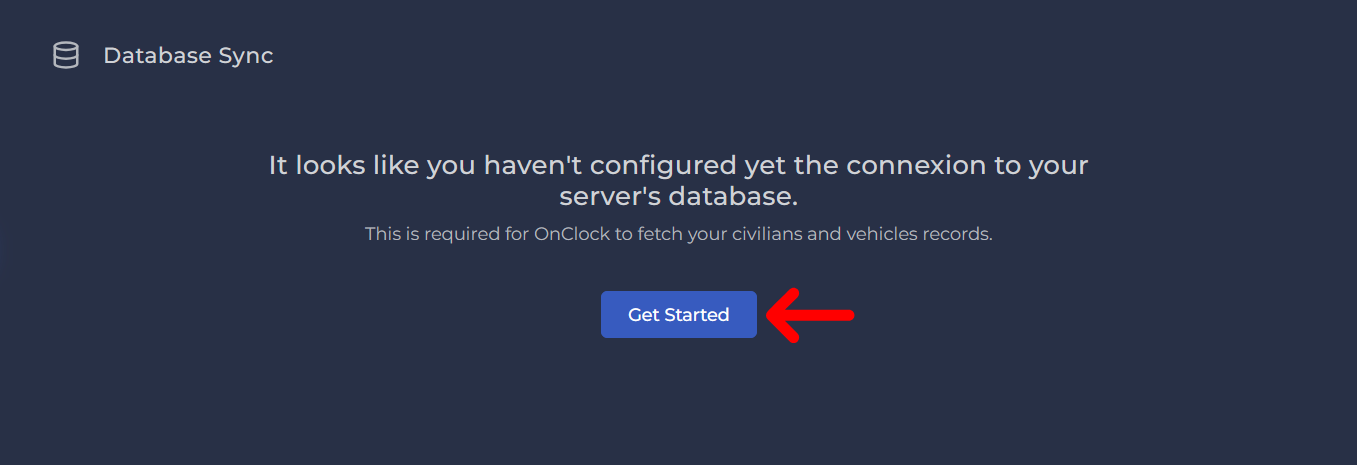
Click "Get Started" to begin the setup process.
In the Host field, enter the domain name or IP address of your database server.
On your database server, create a new username and a strong password.
WARNING
Your password is stored securely and encrypted, but we recommend using a read-only user with the minimum required permissions. We also recommend restricting connections to our servers only.
You can find an up-to-date list of our servers on the right side of the setup modal.
Enter the username and password in their respective fields.
In the Database Name field, enter the name of your database.
Verify that all required information is entered correctly.
Example:
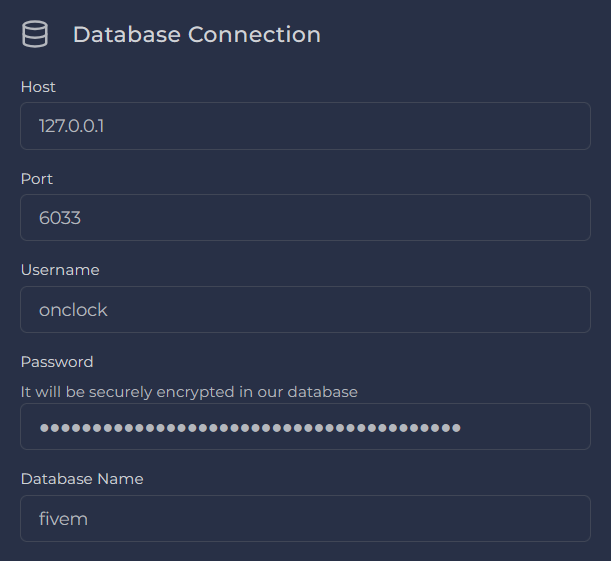
If properly filled, your form should look something like this. Click "Test Connection" to verify the connection.
If the test is successful, proceed. Otherwise, check the error message and try again.
Example:
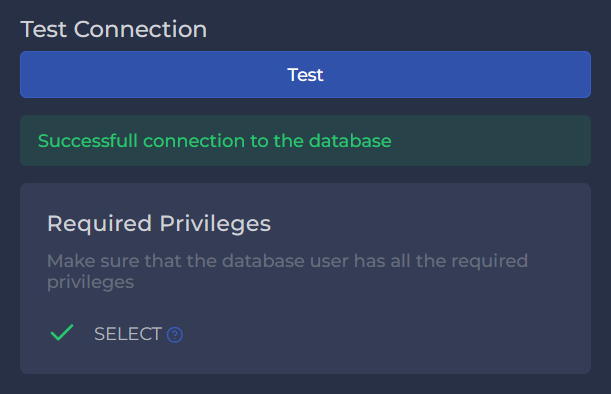
In this example, only the SELECT permission is enabled for the user. WARNING
Ensure the user has only the minimum required permissions for database access. Permissions marked with a green checkmark are required; any unnecessary ones should be removed.
If using a supported framework, select it in the automapping field. This will automatically map the tables and columns.
Example:
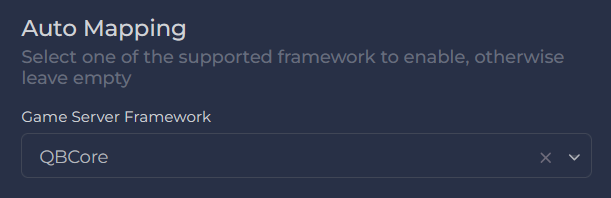
Click "Next".
Map the Citizens' Table
If using a supported framework, the citizens' table will be mapped automatically. You can skip to step 4; otherwise, you'll need to map the columns manually.
Example:
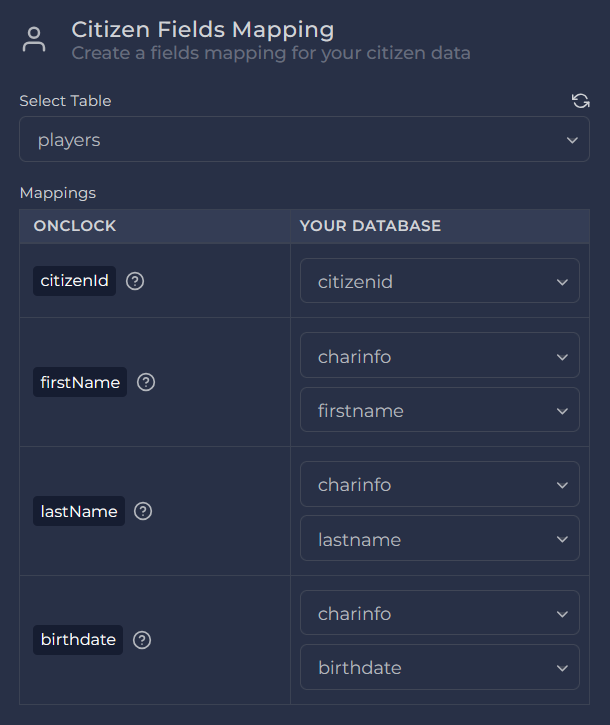
In this example, the citizens' table is mapped automatically with the QBCore framework. Select the table that contains your citizens' data.
Map the columns to their corresponding fields.
TIP
- Hover over the question mark icon for explanations.
- If a second dropdown appears, the column is formatted as JSON. You must select the nested property.
Click "Test Connection" to verify.
If successful, up to three citizens from your database will be displayed. Otherwise, check the error message and try again.
Example:

Click "Next".
Map the Vehicles' Table
If using a supported framework, the vehicles' table will be mapped automatically. You can skip to step 4; otherwise, you'll need to map the columns manually.
Example:

In this example, the vehicles' table is mapped automatically with the QBCore framework. Select the table that contains your citizens' data.
Map the columns to their corresponding fields.
TIP
- Hover over the question mark icon for explanations.
- If a second dropdown appears, the column is formatted as JSON. You must select the nested property.
Click "Test Connection" to verify.
If successful, up to three citizens from your database will be displayed. Otherwise, check the error message and try again.
Example:

Click "Next".
Map the Licenses and Permits Table
If using a supported framework, the licenses and permits table will be mapped automatically. Skip to step 5. Otherwise, map the columns manually.
Example:

In this example, the licenses' table is mapped automatically with the QBCore framework. Select the type of link between citizens and licenses. If you're unsure, feel free to contact the support.
Select the table containing the licenses' data. It can be a separate table or in some cases the same as your citizens' table.
Map the columns accordingly.
TIP
- Hover over the question mark icon for explanations.
- If a second dropdown appears, the column is formatted as JSON. Select the nested column.
Click "Test Connection" to verify.
If successful, up to three citizens with their licenses will be displayed. Otherwise, check the error message and try again.
Example:
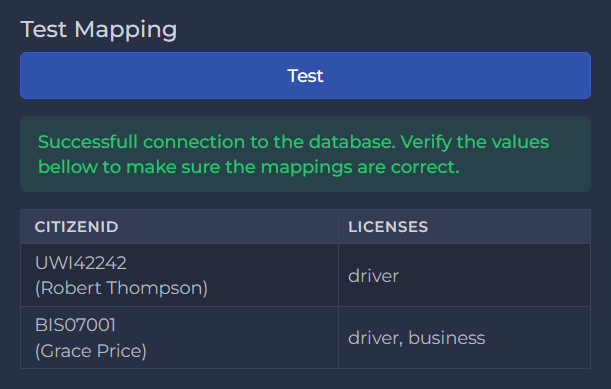
Click "Next".
Configure License Name Mapping
This step maps license names from your database to those in the MDT (e.g., driver → Driver's License).
If using a supported framework, the mapping is created automatically. You may need to add additional mappings if you have extra licenses.
Example:
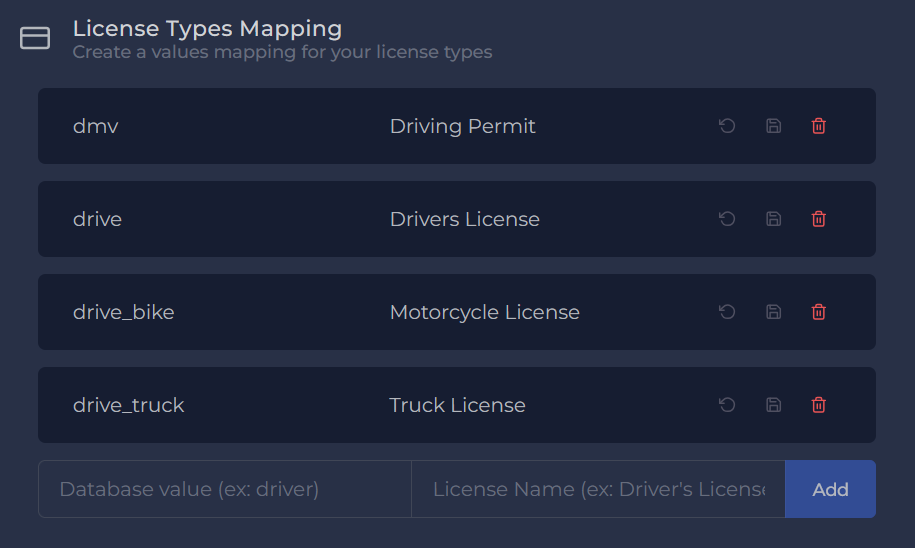
In this example, the licenses names are added automatically based on the QBCore framework. To add a new license name, enter the database value and the display name for the MDT, then click "Add".
Repeat the previous step for each additional license.
Click "Next".
Review and Save the Setup
Review your setup. To make changes, click on the step number at the top of the modal.
Click "Save". You should see a success message.
Example:
Database Sync is Ready
Congratulations! You have successfully set up the database sync feature for your community. You can now view your citizen and vehicle data in real time inside the MDT.
For assistance, reach out to our support team. We're happy to help!